Upgrading to a smart thermostat can transform the way you manage your home’s energy use, providing greater comfort, convenience, and potential cost savings. These devices do more than adjust temperatures—they adapt to your routines and preferences to maintain optimal efficiency year-round. While installation might seem intimidating at first, the process is simple with the right steps. Follow these quick and easy installation tips to help you seamlessly set up your smart thermostat and enjoy smarter climate control.
Understanding Smart Thermostat Benefits
Smart thermostats bring a wealth of potential benefits to homeowners. By learning your schedule and adjusting the temperature accordingly, they might optimize energy usage, possibly leading to reduced utility bills. Many smart thermostats are compatible with smartphones and voice commands, allowing remote access and control. This means you could adjust your home’s temperature from anywhere, maximizing convenience.
Some models also offer valuable insights into your energy consumption patterns. They provide data that can help identify opportunities to enhance efficiency and save on heating and cooling costs. Furthermore, the integration of smart thermostats with other smart home systems can potentially create a more comprehensive and interconnected home environment.
Ultimately, a smart thermostat may serve as an investment in both comfort and cost efficiency, contributing to a more sustainable home by potentially reducing energy waste.
Preparing for Installation
Before diving into installation, a few preparatory steps could streamline the process. First, ensure compatibility between your heating and cooling system and the smart thermostat. Most modern systems should be compatible with smart thermostats, but it’s wise to double-check product specifications and compatibility tools provided by manufacturers.
Identify the location of your current thermostat and make note of the wiring layout. This information is crucial for wiring the new device correctly. Consider taking a picture of the existing wiring setup for future reference during installation.
Gather necessary tools before starting. A screwdriver, drill, level, and pliers may be needed. It’s also helpful to have quick access to your Wi-Fi network details, as you’ll likely need to connect the smart thermostat to your system post-installation.
Lastly, shut off power to your HVAC system at the breaker box to ensure safety during installation. This step can prevent potential electric shock, especially when dealing with wiring.
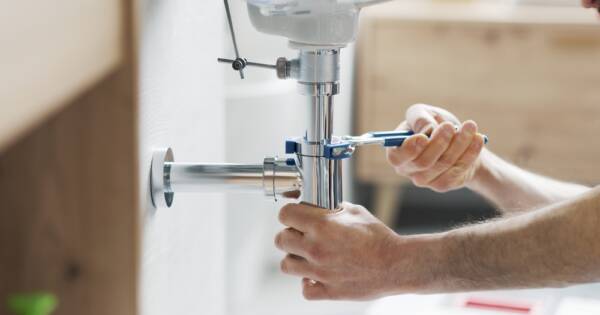
Step-by-Step Installation Guide
To begin installing your smart thermostat, first remove the old thermostat by unscrewing it from the wall. Carefully detach the wiring from the backplate, ensuring wires don’t fall into the wall. Most thermostats have labeled wires; labeling them yourself can minimize confusion when connecting the new device.
Next, mount the new backplate. Use the level to ensure it’s straight before securing it to the wall with screws. If necessary, use wall anchors for better stability.
Once secured, reconnect the wires to the corresponding terminals on the new backplate. Verify these connections against the instructions provided by the manufacturer.
After wiring, attach the smart thermostat unit to the backplate. Restore power to the HVAC system at the breaker box. The thermostat should power on and guide you through initial setup, including connecting to Wi-Fi and adjusting basic settings.
If difficulties arise, consult the manufacturer’s support resources or consider professional installation to avoid complications.
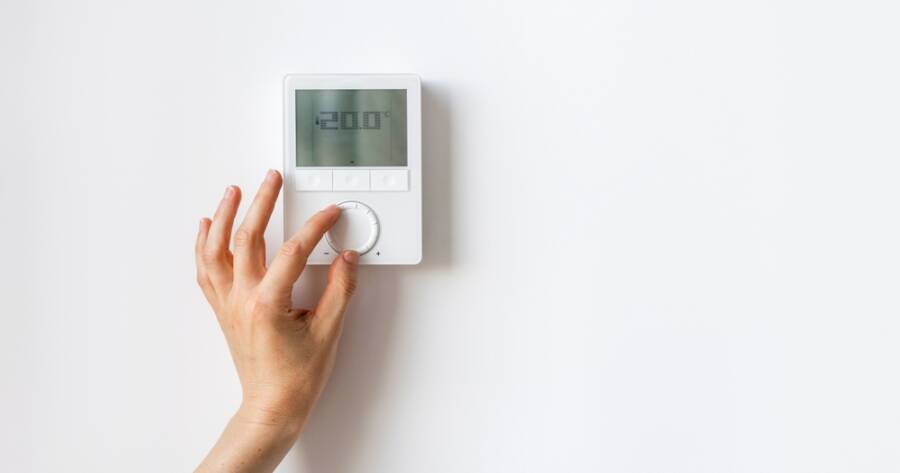
Connecting and Configuring Your Smart Thermostat
With installation complete, the next step is connecting your smart thermostat to your home’s Wi-Fi network. Use the device’s display, follow the setup prompts, and enter any requested network credentials. Connectivity allows you to make full use of remote access and control features.
Following connection, configure your thermostat by setting your preferred temperatures and schedules. Most devices allow you to create daily or weekly schedules that match your routine for optimal efficiency.
Many smart thermostats offer features like geofencing, which uses your smartphone’s location to adjust temperatures when you’re away. Exploring and enabling such features can enhance convenience and energy efficiency.
To gain insights into your energy usage, familiarize yourself with the available data and reports. Understanding these metrics can potentially inform adjustments that contribute to greater energy savings.
Troubleshooting Common Issues
While installing a smart thermostat can be straightforward, users might occasionally encounter issues. If the thermostat doesn’t turn on after installation, ensure that power to the HVAC system is restored, and check for correct wire connections and securely placed batteries (if applicable).
If connectivity issues arise, verify your Wi-Fi information and ensure the network signal is strong. Resetting the router or device might resolve connectivity glitches.
Inconsistent temperature readings could point to poor thermostat placement. Ensure it’s situated away from drafts, direct sunlight, or heat-producing appliances, as these factors may skew functionality.
Should problems persist, consult the troubleshooting section of the user manual. Online forums or customer support can also be valuable resources for resolving installation issues.
Embrace the Future of Home Comfort
Installing a smart thermostat is a practical step towards a more efficient and comfortable home. This device can simplify managing energy usage and potentially lower utility costs. By following these installation tips and configuring the device to your preferences, you can enjoy a seamless transition to intelligent climate control.
As technology advances, embracing smart home solutions ensures that you stay at the forefront of convenience and innovation. Transform your home environment today and enjoy the benefits of smart living.